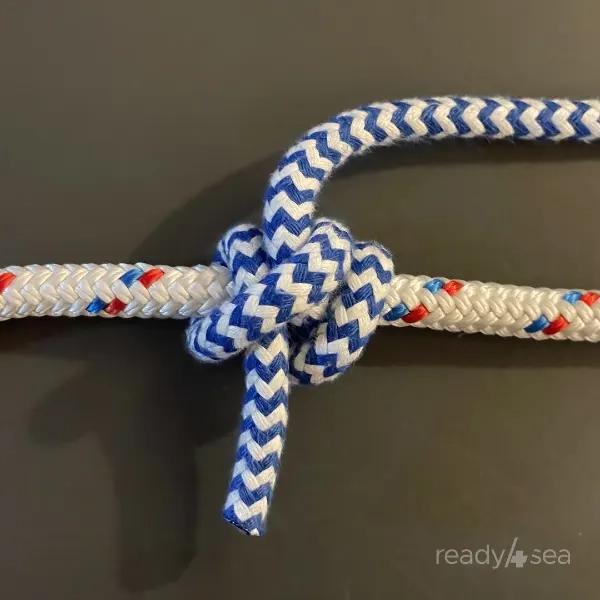
7 Hitches for a smooth ride aboard
When you’re on deck, the right knot can save you time, effort, and sometimes a lot of frustration. In the first three installments of this series, we covered stopper knots, bends, and loops. Those families solved common problems a sailor faces: preventing lines from running away, and connecting lines securely. The final piece of the puzzle is the hitch.
Hitches give you a reliable, adjustable fastening point that can be loaded, shifted, and released without having to splice or re‑tie the whole line. In this article we’ll walk through seven of the most useful hitches. Before we get going, feel free to jump back to previous knots if you feel you need a quick refresher.
What Exactly Is a Hitch?
A hitch is a knot that fastens a lines to an object. That can be a rail, a cleat, a post, a spar, any piece of hardware, or even another line. Unlike a loop, which creates an eye in the line itself, a hitch creates a dynamic connection that can be tensioned, slid, or released while the line remains attached to the object. The load is transferred to the object rather than being borne solely by the line’s own fibers. For this reason, a well‑tied hitch can hold a surprisingly high percentage of the line’s breaking strength while remaining easy to inspect and adjust. The hallmarks of a good hitch are:
- Holding power under load: the hitch should bite into the object without slipping, even when the direction of pull changes.
- Ease of release: after the load is removed, the knot should come undone without excessive fiddling or the need to cut the line.
- Low tendency to jam: a hitch that snarls makes quick adjustments impossible, especially in wet or cold conditions.
With those criteria in mind, let’s examine seven hitches. Every mariner should have most of them at the ready.
Clove Hitch
- How to Tie: A clove hitch is essentially two half-hitches around the object. Wrap the standing part of the line around the post, bringing the working end back toward you. Cross the working end over the standing part. Bring the working end around the post a second time, laying it parallel to the first turn. Slip the working end under the crossing point and pull tight. The two turns should sit snugly side‑by‑side on the post.
- Strengths: The clove hitch is quick to dress and easy to adjust. Because the two turns lie next to each other, you can slide the knot forward or backward along the post simply by pulling the standing part. It works well on cylindrical objects such as masts, stanchions, or railings. As such, it is the go‑to hitch for temporarily securing a line while you’re positioning a sail or a fender.
- Weaknesses: On smooth or tapered surfaces the clove hitch can roll or slip, especially when the load is applied at an angle rather than directly away from the post. Without a backup, a sudden shock load can cause the knot to capsize.
- Tips: Add a half‑hitch around the standing part if the post is slick or if you expect a jerky pull. Dress the knot tightly before loading: a loose clove hitch is prone to creep.
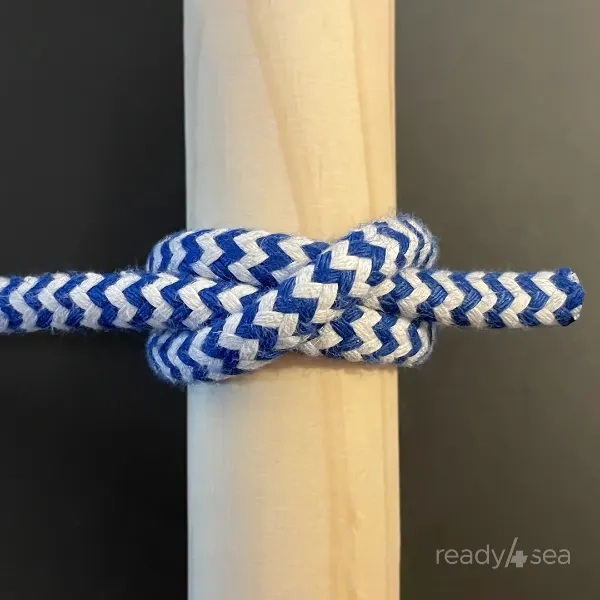
Round Turn and Two Half‑Hitches
- How to Tie: Start with a round turn. Wrap the line completely around the post. Continue turning to bring the working end back alongside the standing part. Form a half‑hitch by passing the working end over the standing part and back under itself. Pull tight. Repeat the half‑hitch a second time, stacking it directly on top of the first. The two half‑hitches should sit neatly beside the round turn.
- Strengths: The round turn distributes the load over a larger surface area, reducing pressure on the post and increasing friction. Adding the two half‑hitches locks the line in place, making this hitch exceptionally reliable for anchoring a line to a bollard, a dock cleat, or a mooring post. It holds well even when the pull direction varies.
- Weaknesses: Because it uses three turns, the hitch consumes more rope length than a simple clove hitch. On very thin or slick posts the half‑hitches can loosen if not dressed properly.
- Tips: Leave a short tail (≈ 10 cm / a few inches) after the final half‑hitch and tuck it under the standing part to prevent slippage. If the line is made out of synthetic and very low‑friction fibers, add a third half‑hitch for extra security. The round turn can be extended to a double round turn if you need additional friction on a particularly smooth surface.
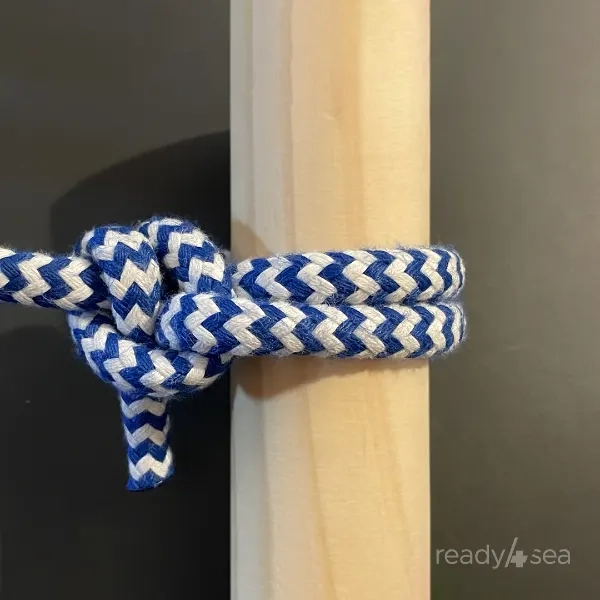
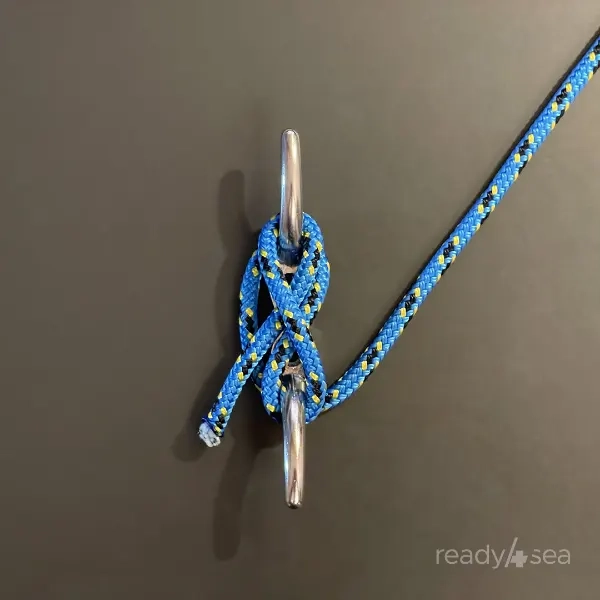
Anchor Hitch
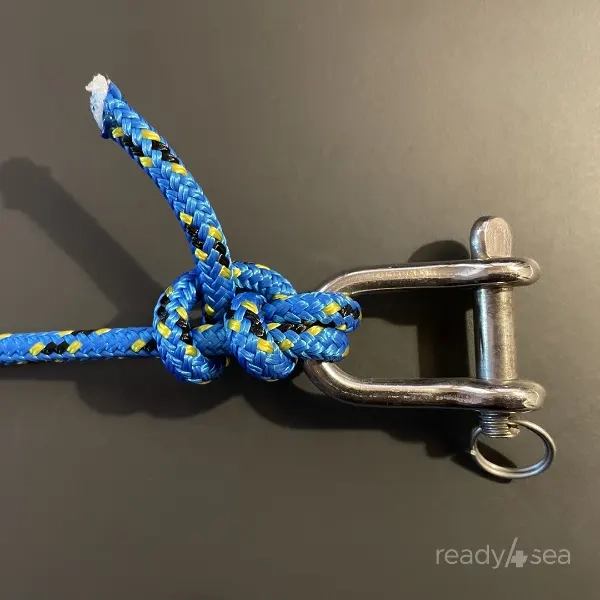
- How to Tie: This knot is tied almost like the round turn and two half-hitches. The only difference comes after having done the round turn: when tying the first half-hitch, the working end is passed inside the round turn, rather than outside. Finish off with another half-hitch and pull the standing part to tighten. The knot will collapse into a compact grip around the object.
- Strengths: The anchor hitch creates a strong, self‑locking eye that resists capsizing under load. Its compact shape makes it ideal for attaching a line to a chain link, a grapnel, or any narrow protrusion where a larger knot would snag. This is pictured above with a shackle. Because the load is taken by the eye rather than the standing part, the hitch maintains a high percentage of the fibers’ breaking strength.
- Weaknesses: If the anchor shank is very smooth, the hitch can slip before the eye fully sets. The knot also tends to jam when heavily loaded, making release difficult without a spare tail.
- Tips: Leave a generous tail (≥ 15 cm / a few inches) and tuck it back under the standing part after tightening. For slick steel anchors, pre‑wrap a short piece of twine around the shank before tying the hitch. The extra texture will improve bite. When you need a quick release, finish with a slipped half‑hitch around the standing part. Pulling the slipped loop frees the hitch instantly.
Halyard Hitch
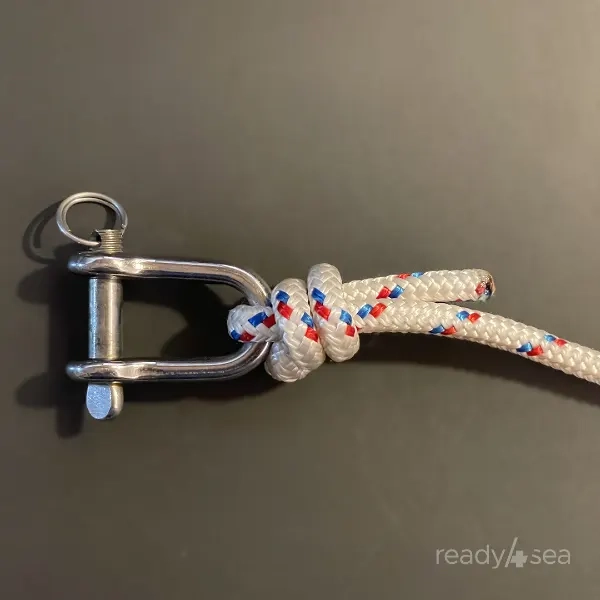
- How to Tie: Pass the line inside the halyard shackle or fitting. Then make a first turn around the standing part, and continue with a second turn further along the line than the first one. Bring the working end back over both loops and feed it through the turns. It should be “exiting” the knot parallel to the incoming standing line. Pull the standing part to snug the hitch. The result is a compact noose that grips the shackle while allowing adjustment if necessary.
- Strengths: This hitch is designed for vertical loads and the parallel working and standing ends are practical. Its low profile prevents interference with adjacent riggingAll the spars (masts, booms, yards), cables and ropes needed to hold and maneuver the sails. More.
- Weaknesses: On very large objects the hitch can slide sideways if the load is not perfectly axial. The knot also offers less friction than a round turn, so it is not advisable for heavy‑load anchoring. It will also likely jam after being loaded and might be difficult to untie.
- Tips: If room allows and the line used is very low friction, add a third turn for redundancy. This maximises grip. When adjusting a halyard, keep the working end short. A long tail can snag on nearby fittings or sheaves. The more commonly used version of the halyard hitch has the working end coming out sideways. The alternative pictured here is cleaner, though.
Rolling Hitch
- How to Tie: Lay the standing part of the line alongside the object you wish to bind (e.g., a pole, a spar, or another line). Make a turn around the object, then bring the working end back over the standing part and under the first turn, forming the first half‑hitch. Repeat the same maneuver a second time, stacking the second half‑hitch directly on top of the first. Pull the standing part to tighten. The two half‑hitches lock together, creating a “rolling” grip that resists movement in one direction while sliding freely in the opposite direction.
- Strengths: The rolling hitch excels at attaching a line to a rod or another line when you need the ability to pull in the same direction. It is the preferred hitch for freeing a jammed sheet on a winch, securing a boom vang, or attaching a line to a spinnaker pole.
- Weaknesses: If the object is very smooth, the hitch can slip before the two half‑hitches bite. Under a sudden shock load the knot may capsize unless the turns are well‑dressed.
- Tips: Dress the two half‑hitches tightly and make sure the second turn sits directly on top of the first. This creates the characteristic “locking” effect. On synthetic lines, add a third half‑hitch for extra security. When using the rolling hitch on another line, keep the standing part parallel to the target line to maximise friction.
Cleat Hitch
- How to Tie: Bring the line to the far end of the cleat. Lay the standing part around the base of the cleat, first around that far end, and then onto the near end. Now you’ll start crossing over the top of the cleat. Now wrap the working end of the line around the far horn or the cleat. Form a second, symmetrical loop by crossing once again over the cleat and wrapping around the base. Finish off by tucking the working end under that last loop. Pull the standing part to snug the two loops against the cleat. The line now grips the cleat in a “figure‑eight” pattern.
- Strengths: The cleat hitch is the standard for securing lines to a dock cleat, a boat’s deck cleat, or any T‑shaped fitting. Its two loops distribute load evenly across both horns, providing a secure hold that can be released easily. It works well with both natural and synthetic ropes and tolerates moderate shock loads.
- Weaknesses: If the cleat’s horns are worn or rounded, the loops can slip. An improperly dressed hitch may develop a “twist” that reduces holding power and makes release awkward.
- Tips: After tightening, give the standing part a firm tug away from the cleat: this “locks” the loops in place. For extra safety on a slick cleat, finish with a slipped half‑hitch around the standing part. There is no need to add additional loops or crossing. These will only make it more lengthy to adjust your lines if needed.
Cow Hitch
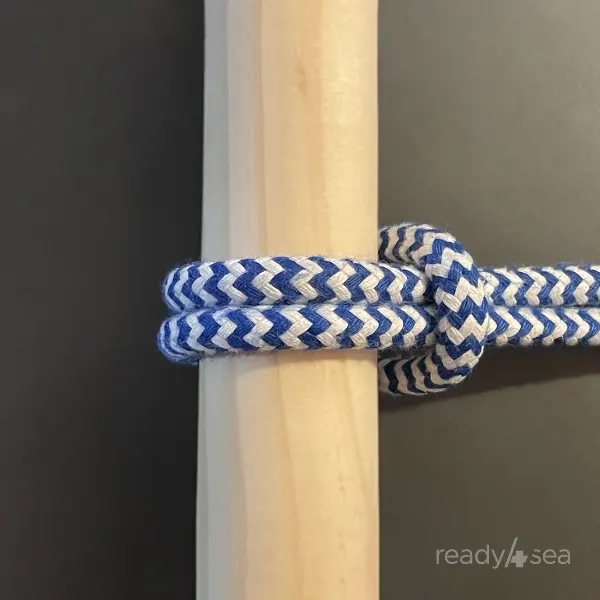
- How to Tie: Pass the line around the object (post, rail, or spar) so that the standing part lies on one side. Bring the working end back over the standing part, then under the object, forming a simple loop that encircles the object. Pull the standing part to snug the loop. The line now forms a “U” that grips the object on both sides.
- Strengths: The cow hitch is a compact, low‑profile hitch that works well when space is limited. For example when attaching a line to a narrow rail or a thin spar. Because the line contacts the object on both sides, the hitch distributes load evenly and can be tightened quickly with a single pull.
- Weaknesses: On smooth or tapered surfaces the cow hitch can slip, especially if the load is applied at an angle or unevenly between both lines. It also provides less friction than a round turn, so it is not recommended for heavy anchoring.
- Tips: Add a half‑hitch around the standing part for a “cow‑plus” configuration when you need extra security on a slick post. Keep the loop as small as possible. A tighter loop increases bite and reduces the chance of slippage. This hitch can be used to fasten a soft shackle to a rail or object.
Subscribe to our monthly newsletter to receive tips on keeping your boat in good health.
Tying up the various knot families
With stopper knots, bends, loops, and now hitches under your belt, you’ve completed the core knot repertoire that every sailor should be familiar with. We have now sailed through the four core families of maritime knots, each addressing distinct situations. Until now, you knew how to prevent a line from slipping, how to join two lines, and how to create a fixed eye. Now, you’ve learned how to fasten a line to an object. Together, all of these give you the flexibility to handle almost any situation on board. If you missed the earlier chapters, you can revisit the stopper knots, bends and loops articles. Keep your lines tidy, your knots strong, and your voyages smooth. Happy tying!