Keep the Right Eye Open: the Best Loop Knots for Boaters
A good knot can be the difference between a smooth sail and a tangled mess. We’ve already explored stopper knots and bends. Both families solve specific problems: keeping a line from running away and linking lines together. The next logical step is to look at the third pillar of a sailor’s knot repertoire: loops.
Loops can be tied at the very end of a rope (as with the classic bowline) or in the middle of a standing line (as with the butterfly loop). By mastering both approaches you gain the flexibility to connect, suspend, and adjust gear without having to cut or re‑tie the entire line. We’ll walk you through five of the most useful loops. We’ll show how each is tied, where it shines and where it falters. Finally, we’ll provide a handful of practical tips to keep your work on deck efficient and safe.
What Loops Are
A loop creates a permanent eye in a rope, giving you a ready‑made attachment point that can bear load, be hooked onto hardware, or serve as a foothold. It opens a space that remains fixed when tension is applied. That eye can receive a hook, a carabiner, another rope, or a piece of hardware, turning a single strand into a versatile anchoring point.
Because the load is distributed around the surrounding fibers, a well‑tied loop typically retains a high percentage of the rope’s original breaking strength. It should also be easy to inspect and adjust. The essential qualities of a good loop are:
- Stability under load – the eye should stay the same size and shape when traction is applied.
- Ease of untying – even after a heavy pull, the knot should release without excessive force or the need to cut the rope.
- Low tendency to jam – a knot that snarls makes quick adjustments impossible, especially in wet or cold conditions.
Loops at the end of a rope are ideal when you need a quick, accessible eye that can be tied and untied repeatedly. Loops tied in the middle of a standing line are valuable when the rope’s ends are already occupied or when you need a fixed attachment point without shortening the usable length of the line. Understanding both expands your toolbox for docking, riggingAll the spars (masts, booms, yards), cables and ropes needed to hold and maneuver the sails. More, rescue, and everyday seamanship. Let’s dive in!
Overhand Loop
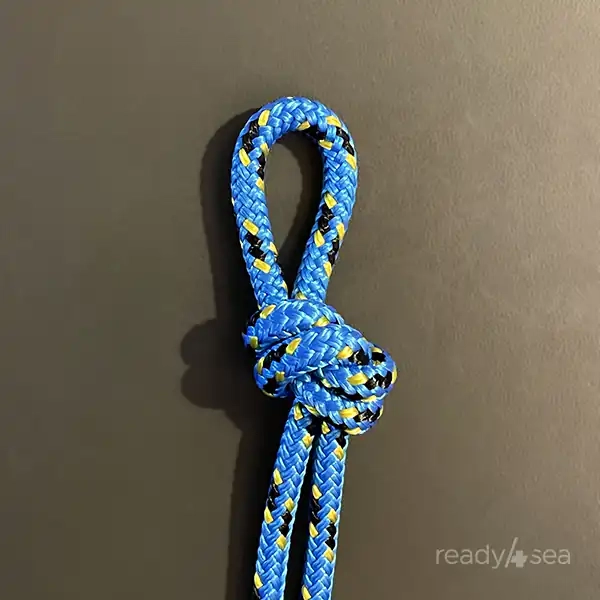
- How to Tie: If you already know how to tie a basic overhand knot, you can use that exact motion to create an eye in the rope. The overhand loop is essentially an overhand knot with a bight instead of a single free end. Hence the similar name. To tie it, form a bight in the rope, then cross over to create an opening. Feed the entire bight through this eye. Finally, tighten the knot so it settles into a compact, neat loop.
- Strengths: Its simplicity is its greatest asset. With only a single crossing, the knot is quick to tie and inspect. That makes it ideal for temporary fixes or for marking a line during a quick check. Because the knot lies close to the rope’s core, it retains a large share of the rope’s original tensile strength, making it suitable for moderate loads such as tagging a line, marking a halyard, or temporarily securing a small piece of gear.
- Weaknesses: Under heavy or sustained tension, the overhand loop can jam, especially on slick synthetic fibers. Once fully tightened, the knot may become difficult to loosen without cutting the rope, which limits its usefulness for applications that require frequent adjustment or release. The overhand loop is not designed to be strongly loaded at both ends in opposite directions. This will weaken it.
- Tips: Keep the loop small and the knot tidy by pulling the standing part snug before tightening the eye. Also, ensure the standing part and the loop are aligned before the final pull. A crooked knot reduces strength and can cause the loop to twist under load.
Bowline
- How to Tie: The bowline is perhaps the most celebrated loop in sailing lore. Begin by forming a small “rabbit hole” near the standing part. The working end (the rabbit) comes up through the hole, around the standing part (the tree), and back down through the hole. Dress the knot by pulling the standing part and the loop in opposite directions, then tighten.
- Strengths: Known as the “king of knots,” the bowline creates a strong, non‑slipping loop that is easy to tie even with cold, gloved hands. It holds firm under steady loads but does not jam, so it can be untied quickly after a haul. Its round, open shape distributes stress evenly, preserving rope strength.
- Weaknesses: Under cyclic loading or when subjected to sudden shocks, the bowline can loosen if not properly dressed. In very slippery synthetic ropes, the knot may slip unless a backup half‑hitch is added. It also tends to work loose when left unattended for long periods.
- Tips: After tying, pull the standing part hard to set the knot. Then give the loop a firm tug to “lock” the rabbit’s tail. For extra security on slick lines, finish with a single half‑hitch. When using a bowline for a rescue or a critical load, double‑check that the tail is at least 15 cm or six inches long.
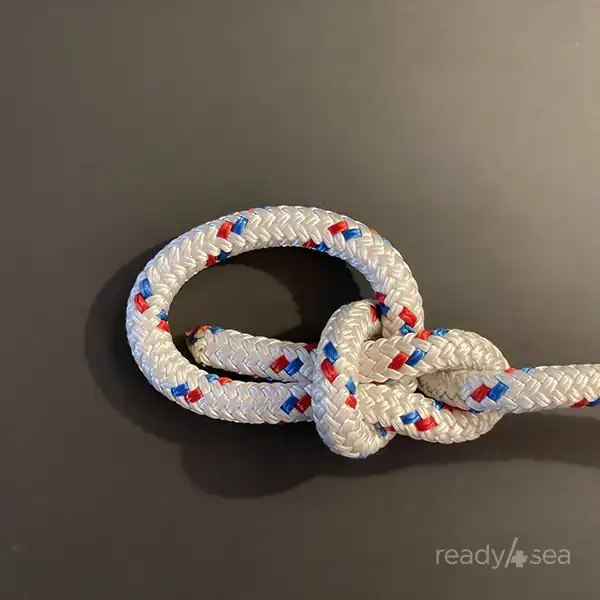
Bowline on a Bight
- How to Tie (see our tutorial video): The bowline on a bight is a variation that creates a closed loop without needing the rope’s ends. Form a bight in the standing part. Then make a small loop (the “eye”) with the bight by crossing back over itself. Then bring the free end of the bight up through the eye. The tricky part is to now open up the bight widely and bring it around the entire knot, so that it now surrounds the standing part of the bight. Pull the loop so as to enlarge it and tighten the knot.
- Strengths: Because it uses a bight, this knot can be tied in the middle of a line, which is handy when the rope’s ends are inaccessible. The resulting loop is strong and stable, making it perfect for attaching a harness, a belay device, or a mooring line. It also retains a high percentage of the rope’s breaking strength.
- Weaknesses: The knot is bulkier than a simple bowline, which can cause snagging on tight hardware. If the rope is very stiff, dressing the knot neatly can be challenging, and an improperly set knot may slip under shock loads.
- Tips: Keep the loop size appropriate for the intended attachment. Too large and the knot will be harder to dress. Too small and the loop may cinch under load. When tying on a thick rope, use a little water or lubricant to help the bight slide smoothly.
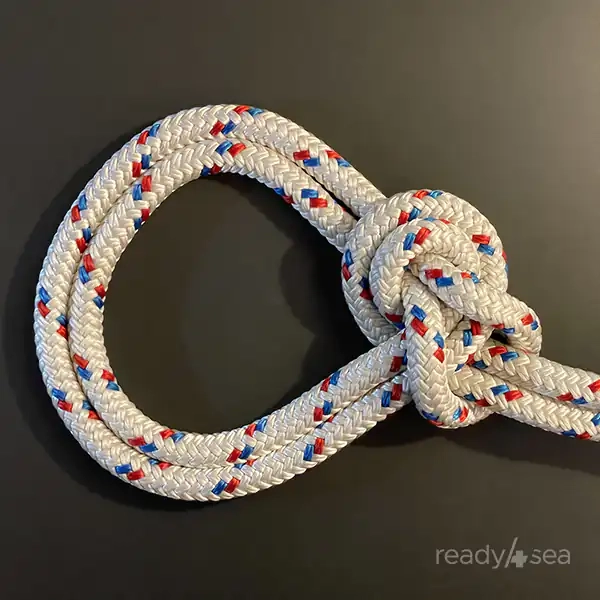
Portuguese Bowline
- How to Tie: The Portuguese bowline is a lesser‑known but highly versatile loop. It’s essentially a bowline with an additional loop. Start with a bight in the standing part with enough length in the working part. Have that working part come fly by the “rabbit hole” without entering it and continuing on to form another loop. After the second loop is complete, finish off as for a bowline. Bring the working end up through the hole, around the standing part (the tree), and back down through the hole. Finally, pull both the standing and working parts to tighten.
- Strengths: This knot produces a compact, low‑profile double loop that resists jamming even under heavy loads. Its structure gives it excellent stability when used as a rescue harness or a climbing anchor, because the load is shared across multiple strands. The Portuguese bowline also handles shock loads better than a standard bowline.
- Weaknesses: Because the knot involves several turns, it can be confusing for beginners to dress correctly. On very thin or slick rope, the knot may slip if the tail is not left sufficiently long. Its slightly larger bulk compared with a simple bowline can make it less suitable for tight fittings.
- Tips: Practice the knot with a spare piece of rope until the sequence feels natural. Always leave a tail of at least 20 cm or eight inches and tuck it back into the knot’s body for added security. When using it as a harness loop, double‑check that the loop’s diameter matches the intended attachment point to avoid accidental over‑tightening.
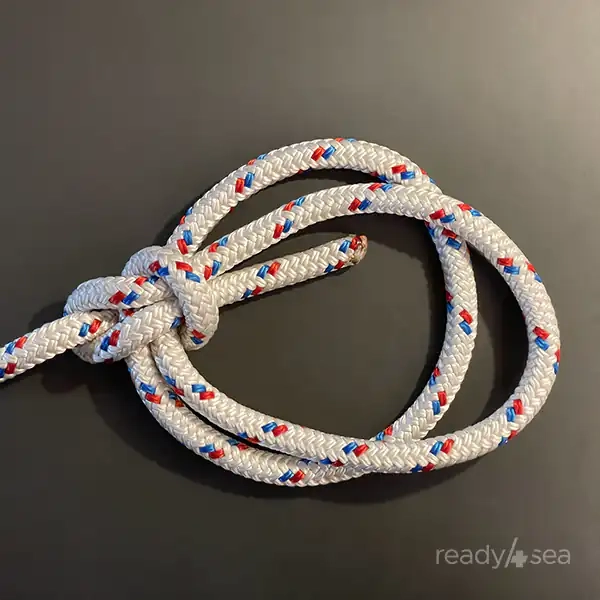
Alpine Butterfly Loop
(or simply Butterly Loop)
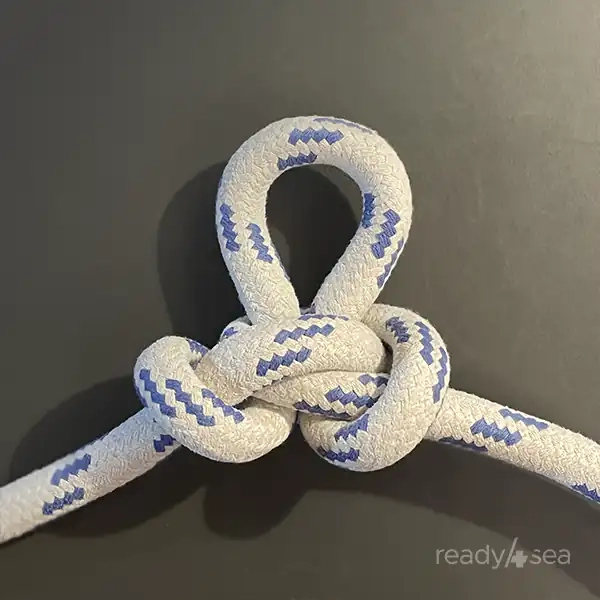
- How to Tie: The butterfly loop creates a fixed eye in the middle of a rope without disturbing the standing parts. To tie it, form a U-shaped bight facing up and twist this loop twice. Now bring the loop from top to bottom above both twists, creating a pretzel shape. Continue the motion, so that the bight loops back behind the knot and have it come out from back to front through the central opening, in between the two twists. Finally, tighten by pulling all three ends (both standing parts and the loop).
- Strengths: This knot shines when you need a strong, load‑bearing loop in the middle of a line, such as for creating a mid‑rope anchor or a foot loop in a climbing rappel. It distributes load symmetrically, preserving up to 90 % of the rope’s strength. The butterfly loop does not jam and can be untied easily even after a heavy load.
- Weaknesses: The knot can be tricky to tie correctly on very thick or stiff rope, leading to a mis‑dressed knot that loses strength. If the loop is left too large, the knot may shift under load, reducing its reliability. It also occupies more rope length than a simple overhand loop.
- Tips: Keep the loop size just large enough for the intended attachment – a tighter loop reduces the amount of rope used and improves stability. When tying on a new rope, practice the twist‑and‑pull motion slowly to ensure the turns are clean.
Make sure you don’t miss our next posts, including when we cover hitches: subscribe to our free monthly newsletter!
The Last Turn of the Rope
Loops add to your knotting toolbox that began with stopper knots and bends. They make for flexible eyes that can be attached, adjusted, and released as the situation demands. Whether you need a quick overhand loop for a temporary tag, a trusty bowline for a rescue line, or a sturdy butterfly loop for a mid‑rope anchor, each knot brings its own blend of strength, ease of use, and quirks.
Mastering these five loops will give your crew the confidence to tackle a wide range of tasks, from securing a dinghy to riggingAll the spars (masts, booms, yards), cables and ropes needed to hold and maneuver the sails. More an awning. Stay tuned for our next installment. We’ll explore hitches (the knots that bind rope to objects). This will round out the essential repertoire for any sailor or outdoor enthusiast. Happy tying!
Keep reading: securely fasten your line to a fixed point with 7 different hitches.