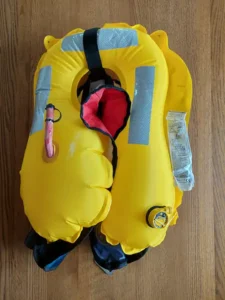
Looking after your inflatable life jacket
Your life jacket can save your life! Good upkeep is essential to ensure its reliability. It will also last longer.
Here are a few best practices for routine maintenance and periodic servicing of your life jacket. But let’s start with a reminder of the types of personal flotation devices (PFDs) commonly used.
Which type of PFD is which?
Inherently buoyant life vests
This is the traditional boxy foam vest. Its buoyancy is guaranteed because it doesn’t depend on any inflation system. Of course, the tradeoff is it’s bulkier. This type of life vest is less complex to maintain, so we won’t focus much on those within the context of this article. But it’s important to inspect it before use, rinse and dry it thoroughly, and store it in a dry, UV-protected place.
There are two types of inherently buoyant life vests for recreational use:
- The standard orange boxy life jackets, which are approved for use on recreational craft.
- Lighter vests, suitable for water sports such as kayaking, water-skiing or dinghy sailing.

Inflatable life jackets
Inflatable life jackets have largely replaced their foam counterparts, as they are more practical and comfortable to wear. They can also incorporate a safety harness, which we strongly recommend. On the other hand, it’s a more complex piece of equipment, requiring greater care to ensure reliability.


Parts of an inflatable life jacket
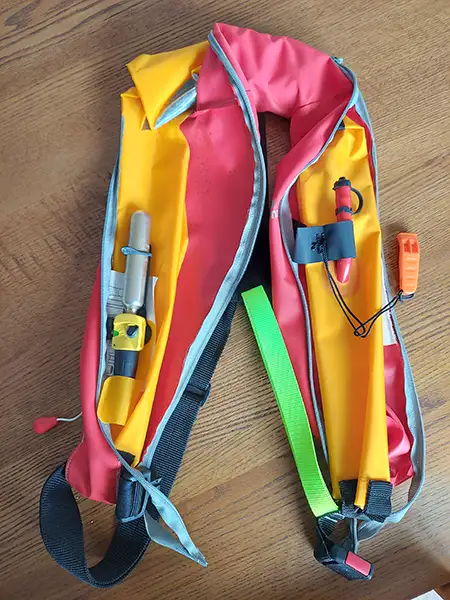
The inflatable life jacket comprises several components:
- A protective horseshoe-shaped outer shell made of high-resistance fabric, worn around the neck;
- A system for attaching the life jacket to the boater: adjustable straps, quick-release fasteners, and often a D-ring for attaching a lanyard or tether, in which case the PFD also serves as a safety harness;
- An inflatable bladder, carefully folded into the canvas cover, and securely fastened to it;
- A gas inflation system: this consists of a carbon dioxide cylinder or cartridge for inflation and a manual or automatic inflator. Any automatic mechanism can also be operated manually;
- An emergency oral inflation tube, fitted with a pressure relief valve;
- A warning whistle;
- Reflective elements;
- Some more sophisticated models incorporate additional devices, such as flashlights or automatic distress beacons (MOBs).

Activating an inflatable life jacket
There are two types of inflatable life jackets: manual and automatic.
With a manual inflatable life jacket, the boater activates the inflator by pulling a cord or handle. This avoids accidental triggering in the event of a big wave, or even storage in an excessively damp area (in the case of pill inflators). Racers, or some inshore sailors, who are particularly exposed to spray, might prefer this type of life jacket.
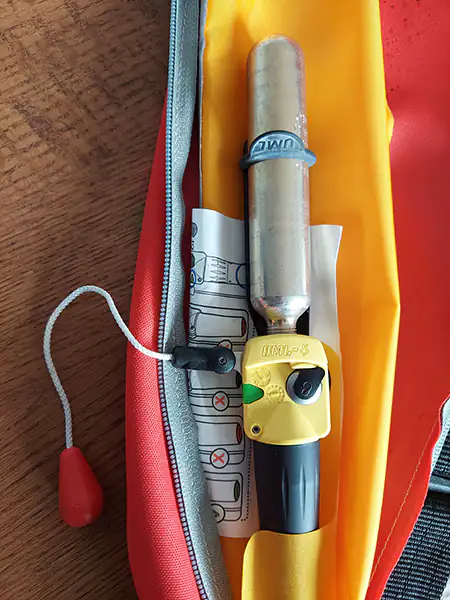
Automatic inflatable life jackets, meanwhile, have the advantage of being operational even if the person is unconscious. A mechanical release system punctures a carbon dioxide gas cylinder when immersed. It does not require triggering by the man overboard.
There are two types of common trigger systems:
- Water-sensitive bobbin (salt or cellulose pill): when submerged, the pill dissolves or retracts, releasing a spring and needle mechanism which will puncture the gas cylinder.
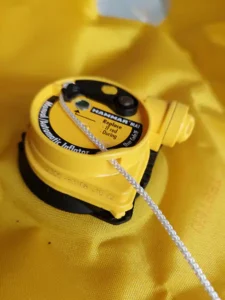
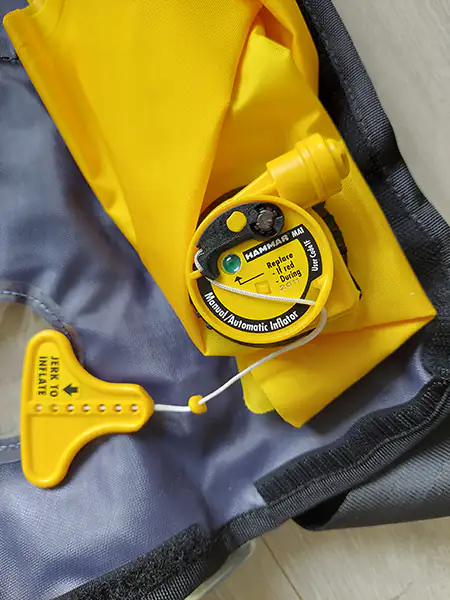
- Hydrostatic valve (known as Hammar inflator, the brand name of the system): water pressure triggers the inflation when the life jacket is immersed under the water surface.
Routine maintenance of your life jacket
Life jackets are exposed to an aggressive marine environment (saltwater, UV radiation, friction). Whatever the type of life jacket, it’s essential to ensure it’s reliable, thanks to quality routine maintenance. This will ensure a longer lifespan and enable you to safely reach your next service date. Routine maintenance refers to best practices you should follow every time you wear your life jacket.
Before using your life jacket
- Carry out an overall visual inspection: check for tears, the good condition of seams, fasteners, straps, reflective strips. The jacket should look in good working order;
- Check the manual inflation cord is accessible;
- Carry out a visual check of the inflation system by partially opening the protective shell. The cylinder and inflation mechanism should be properly tightened. The service indicator should be green. The gas cartridge should show no signs of corrosion. Finally the expiration dates should not be exceeded.
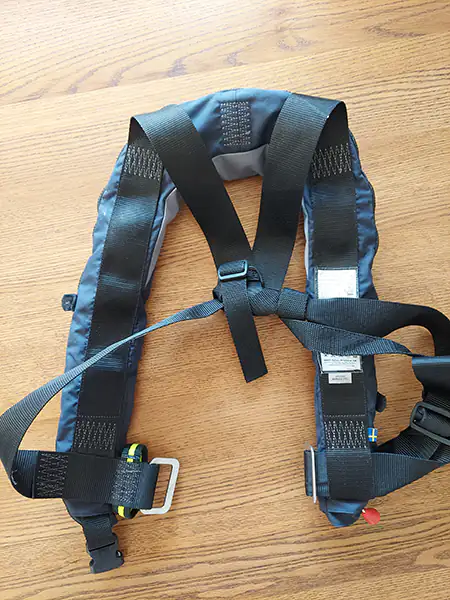
After using your life jacket
- Rinse with fresh water to remove any salt. It’s often best to rinse with a damp sponge, especially if the trigger is a soluble pill. Otherwise, simply disassemble the mechanism before rinsing. If the jacket has been thoroughly soaked, we also recommend rinsing the inflatable bladder;
- While rinsing, remove any traces of mold, which could accelerate the aging of the life jacket;
- Dry the jacket thoroughly before storing;
- Store your life jacket in a dry place, out of direct sunlight (UV light can be disastrous for stitching and seams).

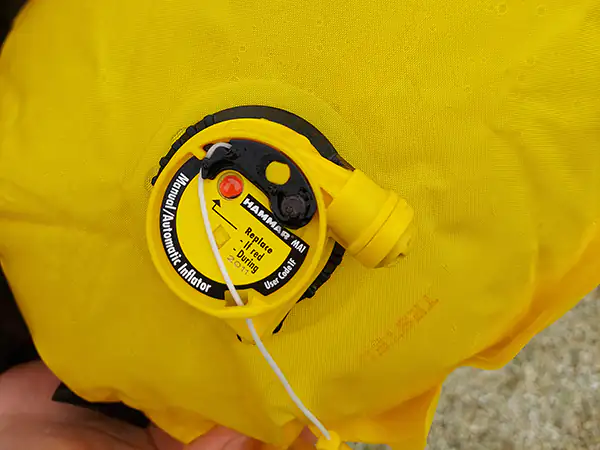
Periodic inspection and testing of your inflatable life jacket
Some jurisdictions do not explicitly mandate periodic maintenance and inspection of personal flotation devices (PFDs). However, manufacturers generally recommend a preventive service every 2 or 3 years. This should also be performed after any triggering of the inflation mechanism, and of course when the various components expire. Also note that manufacturers generally recommend you entirely replace your life jackets after 10 or 12 years. You can plan your next service and schedule the replacement in Ready4Sea, your free boat maintenance app.
Below you’ll find our recommendations for servicing and rearming your life jacket yourself. The check must be carried out in accordance with the manufacturer’s instructions, and if in doubt, it’s best to have it carried out by an approved professional.
Perform routine maintenance tasks even more thoroughly
As a reminder, this involves carrying out a good visual inspection, rinsing all the components of the life jacket, then drying properly.
In particular, this is an opportunity to clean more thoroughly, using running water. On hydrostatic systems, be careful not to get any water inside the bladder when disassembling the valve.
Replace the automatic inflation system
Start by buying the right rearming kit for your life jacket – it’s important to replace the full inflation mechanism, including cylinder, bobbins, pills and green pins depending on your model.
Bobbin inflators
- Unscrew the gas cylinder and the water soluble pill;
- Install the new bobbin, and tighten until snug;
- Install the new cylinder, and tighten until snug;
- Depending on the model, check that the service indicators are green and/or install the proper green pins.
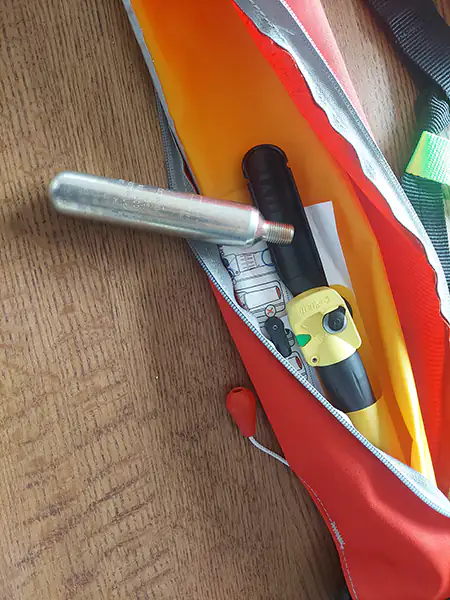
Hydrostatic inflators
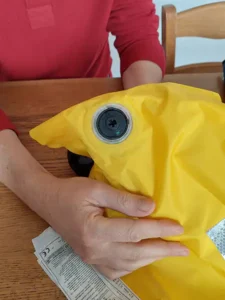
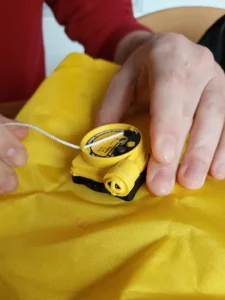
- Unlock the hydrostatic inflator using the supplied key, by prying the corner between the black disc and the yellow cap;
- Rotate the black disc and remove the mechanism;
- Extract the cylinder from the air bladder;
- Insert the new cylinder, with the inflator base facing the bladder hole – this is the most delicate operation;
- Place and clip the new inflator onto the base;
- Lock by rotating the black disc opposite the yellow cap.
Test and store your PFD
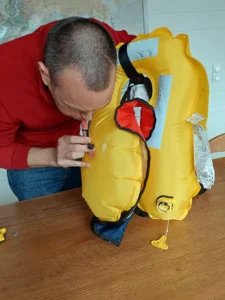
Test the bladder des not leak:
- Using the mouth inflation tube, inflate the bladder by mouth to its maximum capacity;
- Leave inflated for 12 to 24 hours to ensure it can withstand the pressure for an extended period of time;
- Deflate the bladder: on some models, depressing the bladder can be done using the reverse of the tube cap;
- Test the whistle and make sure it is accessible when the life jacket is inflated;
- Inspect/check any additional equipment such as harness, emergency flashlight, MOB radio beacon, etc.
Carefully fold the bladder so that inflation is not hampered. Depending on the model, ensure that the inflation system is visible if a transparent window allows checking service indicators at a glance.
Finally, record your inspection in your Ready4Sea app’s logbook.
We encourage you to share this article with other boaters – maritime safety is everyone’s responsibility! And if you haven’t already done so, download the Ready4Sea mobile app, the boater’s free, ad-free digital toolbox.
Subscribe to our monthly newsletter to receive tips on keeping your boat in good health.
While you’re here, how about also making sure your life raft will reliably inflate when you need it most?


