First Tacks #1 – Adding equipment
You’re just starting out with Ready4Sea, that’s great! This is the first in a series of tips, called First Tacks, on how to get the most out of Ready4Sea.
Let’s start with the first step: Adding equipment to your boat.

Equipment on board
What makes boat maintenance complicated to keep track of is the many different fixtures, components and devices on board 👉 We call them equipment.
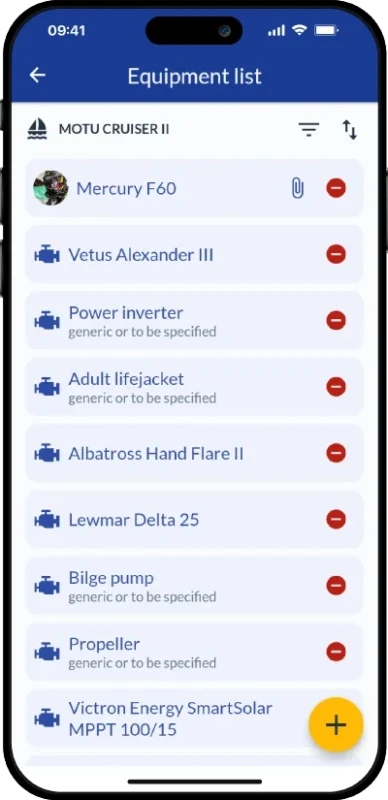
With Ready4Sea, you can gradually build up an inventory of your equipment, and define a maintenance plan for each item. To begin with, and unless your boat is really simple, you first need to add a piece of equipment on board (for example the hull or the engine on a boat).
Adding equipment is a quick process
Let’s start by adding a single piece of equipment.

1. Start adding equipment
➡️ In the navigation bar at the bottom of the screen, tap on “Unit”
➡️ Open the ⋮ menu
➡️ Then choose “New equipment ⊕”Note: You can reach the same page from your equipment list
2. Specify the model
➡️ Find your equipment by category, make and/or model
➡️ Not listed yet? 👉 You can add it using the “My equipment is not listed” button at the bottom
Adding suggested equipment
To speed up the process, let’s now add equipment in bulk.
1. Get a list of suggested equipment
➡️ Open the ⋮ menu as above
➡️ Then choose “Suggested equipment”
2. For each suggested equipment
➡️ Set the equipment count as appropriate (0 won’t add anything)
➡️ Don’t forget to scroll down the list!
➡️ Finally, tap “Add equipment” and confirm
Next steps
🎉 There you go, you now know how to inventory your boat’s equipment.
Note: You can gradually build up your inventory. There’s no need to do everything at once. Start with the most important!
👉 In the next issue, you’ll learn how to create maintenance reminders.
Have you found this guide useful?
